Spring Security是Spring下的一个组件,是一个专注于为java应用程序提供身份验证和授权的框架。
一、环境信息
- SpringBoot: 2.7.3;
- Spring Security: 2.7.3;
二、Maven依赖
<dependencies>
    <!-- Spring Security -->
    <dependency>
        <groupId>org.springframework.boot</groupId>
        <artifactId>spring-boot-starter-web</artifactId>
    </dependency>

    <dependency>
        <groupId>org.springframework.boot</groupId>
        <artifactId>spring-boot-configuration-processor</artifactId>
    </dependency>

    <!-- Spring Security -->
    <dependency>
        <groupId>org.springframework.boot</groupId>
        <artifactId>spring-boot-starter-security</artifactId>
    </dependency>

    <dependency>
        <groupId>org.springframework.boot</groupId>
        <artifactId>spring-boot-starter-thymeleaf</artifactId>
    </dependency>

</dependencies>
三、配置文件
bootstrap.yml
spring:
  thymeleaf:
    cache: false
    encoding: UTF-8
    mode: HTML
四、启动类
@SpringBootApplication
public class MySecurityApplication {
    public static void main(String[] args) {
        SpringApplication.run(MySecurityApplication.class, args);
    }
}
五、默认自带登录
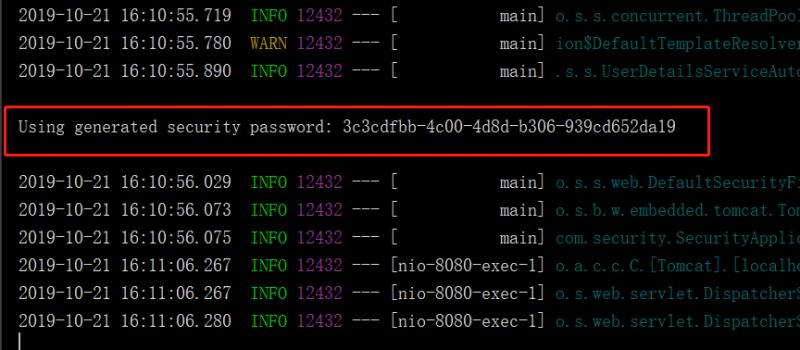
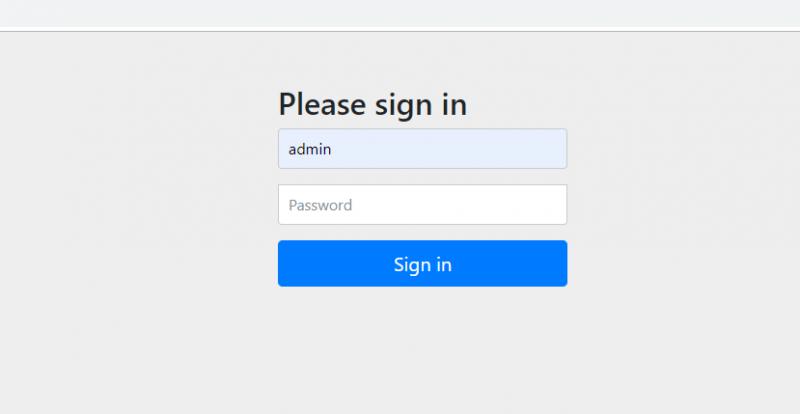
基于以上更改,启动成功后,访问(假设你的服务端口是9205): http://localhost:9205 ,默认用户名为user,密码在启动时控制台有打印。


如果你不想使用默认的用户名和自动生成的密码,可以在bootstrap.yml里进行配置:
spring:
  thymeleaf:
    cache: false
    encoding: UTF-8
    mode: HTML
  security:
    user:
      name: admin
      password: 123456
六、自定义登录页和首页
在src->main->resources创建templates文件夹。在里面添加index.html,作为首页。
<!doctype html>
<html lang="en" xmlns:th="http://www.thymeleaf.org">
<head>
    <meta charset="utf-8">
    <title>每日分享-有事儿没事儿分享一下</title>
    <style>
        .container {
            width: 60%;
            margin: 10% auto 0;
            background-color: #f0f0f0;
            padding: 2% 5%;
            border-radius: 10px
        }

        ul {
            padding-left: 20px;
        }

        ul li {
            line-height: 2.3
        }

        a {
            color: #20a53a
        }
    </style>
</head>
<body>
<div class="container">
    <h1>感谢访问: <span th:text="${username}"></span></h1>
    <ul>
        <li>本站分享各类软件,方便大家获取使用!</li>
        <li>请勿请本站分享内容用来获利,大部分内容来自网络,凡是经本站分发的内容都经试用过,可放心安装!</li>
        <li>本站唯一网址:<a href="https://www.yomige.com/">https://www.yomige.com/</a>,谨防假冒!</li>
    </ul>
</div>
</body>
</html>
新建Controller:
@Controller
public class IndexController {

    @RequestMapping("/index")
    public String index(Model model){
        model.addAttribute("username", "优米格");
        return "index";
    }
}
新建登录页:
<!doctype html>
<html lang="en" xmlns:th="http://www.thymeleaf.org">
<head>
    <meta charset="utf-8">
    <title>登录</title>
    <style>
        .container {
            width: 60%;
            margin: 10% auto 0;
            background-color: #f0f0f0;
            padding: 2% 5%;
            border-radius: 10px
        }

        ul {
            padding-left: 20px;
        }

        ul li {
            line-height: 2.3
        }

        a {
            color: #20a53a
        }
    </style>
</head>
<body>
<div class="container">
    <form th:action="@{/login}" action="/login" method="post">
        Username: <input type="text" name="username" id="username">
        Password: <input type="password" name="password" id="password">
        <input type="submit">
    </form>
</div>
</body>
</html>
注意: 登录页的th:action="@{/login}" ,因为spring-security默认开启了CSRF功能,也就是说会针对PATCH,POST,PUT和DELETE方法进行防护,都会被spring-security检查请求中包含CSRF的token信息,如果没有的话就无法提交了。
增加配置类,对URL进行安全校验:
@EnableWebSecurity
public class MyWebSecurityConfigurer {

    @Bean
    public SecurityFilterChain filterChain(HttpSecurity http) throws Exception {
        http.formLogin().loginPage("/login")
                .successForwardUrl("/index")
                .permitAll()
                .and().authorizeRequests()
                .anyRequest()
                .fullyAuthenticated();
        return http.build();
    }
}
然后重新启动,登录,就是使用我们的自定义页面了。
参考:


最新评论
需要登陆的吗?没有看到离线下载的?
谢谢
百度网盘的提取密码不对
哪个国家成功率高一点?换了十几个了